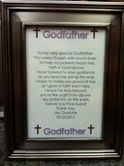
I looked everywhere for godparent gifts that I liked, and couldn't decide on just one, so I kinda took a few and made them my own. FREE PRINTABLE. These were made in 5 X7 frames and I personalized them with her name and baptism date. The PDF file is purple and there is a space to write in the child's name. TRY THIS for an editable printable.... The poem reads as follows...
To my very special Godfather
You were chosen with much love,
to help my parents teach me,
faith in God above.
I look forward to your guidance,
as you lead me along the way.
I hope to make you proud of me,
as I grow in faith each day.
I know I'm truly blessed,
you're like a gift from above.
My protector on this earth,
forever you’ll be loved!
For the Godmother poem, I changed the word protector to angel.
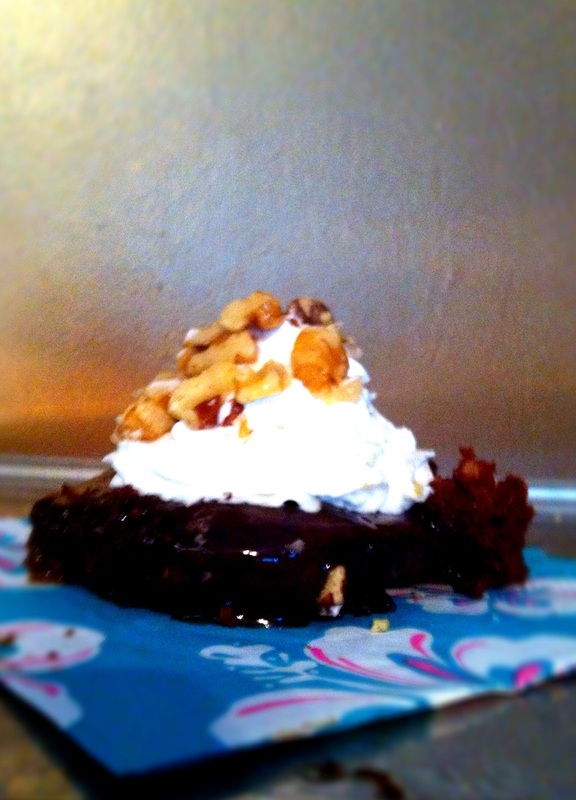
My dad's birthday is this weekend and there's nothing he'd rather do than celebrate with his family by the pool with a nice cold Margarita. I put this together for him. The bucket is a mix we got at (where else??!!) Target. All you do is add a bottle of Tequila and throw it in the freezer, take it out and serve. My daughter picked out the plates, napkins, straws etc at the dollar spot at Target and made the sunshine card. We also grabbed a salt rimmer and put everything on this tray so we can just carry the entire thing (along with the gooey turtle brownie cake) outside for his birthday bash! Wish I would've remembered the limes...
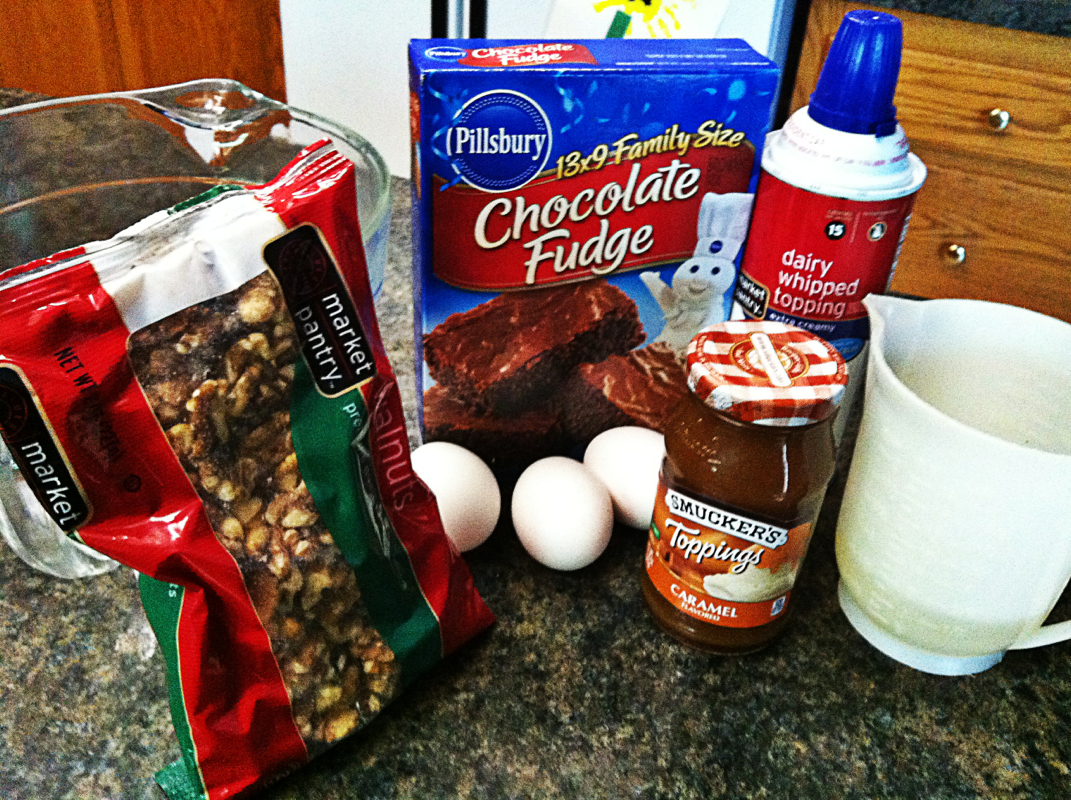
For my dad's birthday I decided to try something new.... I saw a recipe for a brownie cake with caramel sauce and tweaked it just a little. Recipe:
1 family size box of brownie mix
3 eggs
1/2c oil
1/4c water
Nuts ( I used walnuts)
1 jar caramel topping
1 can whipped cream
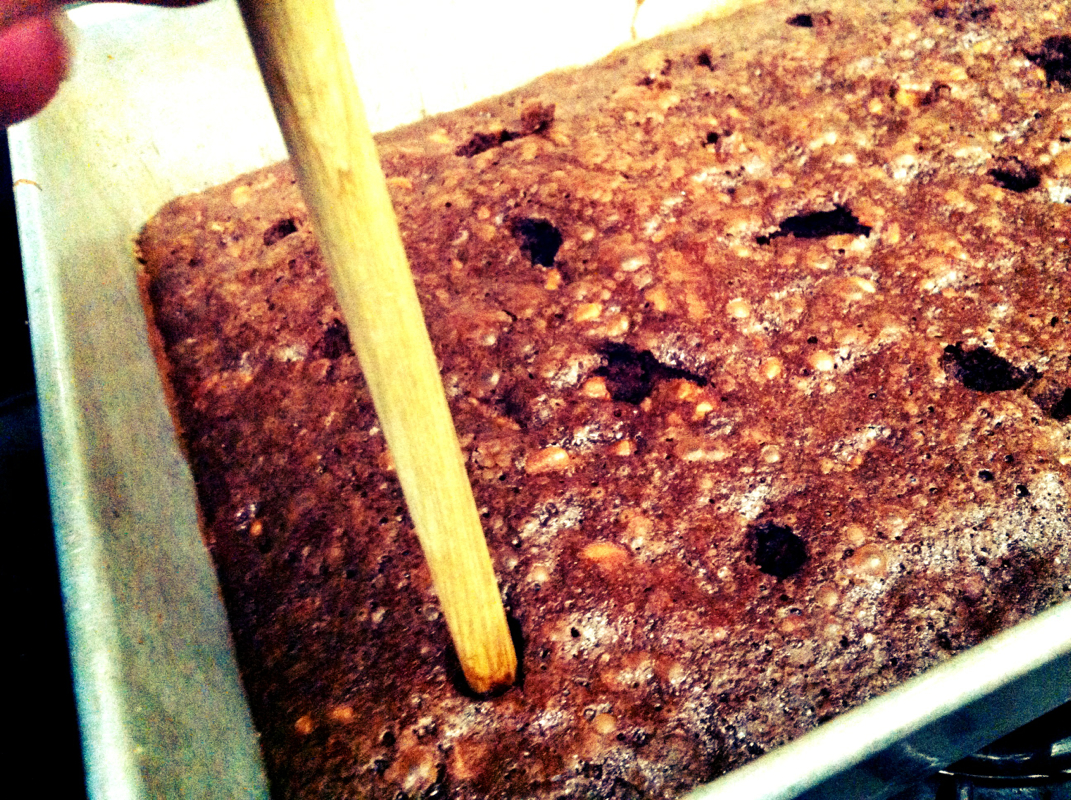
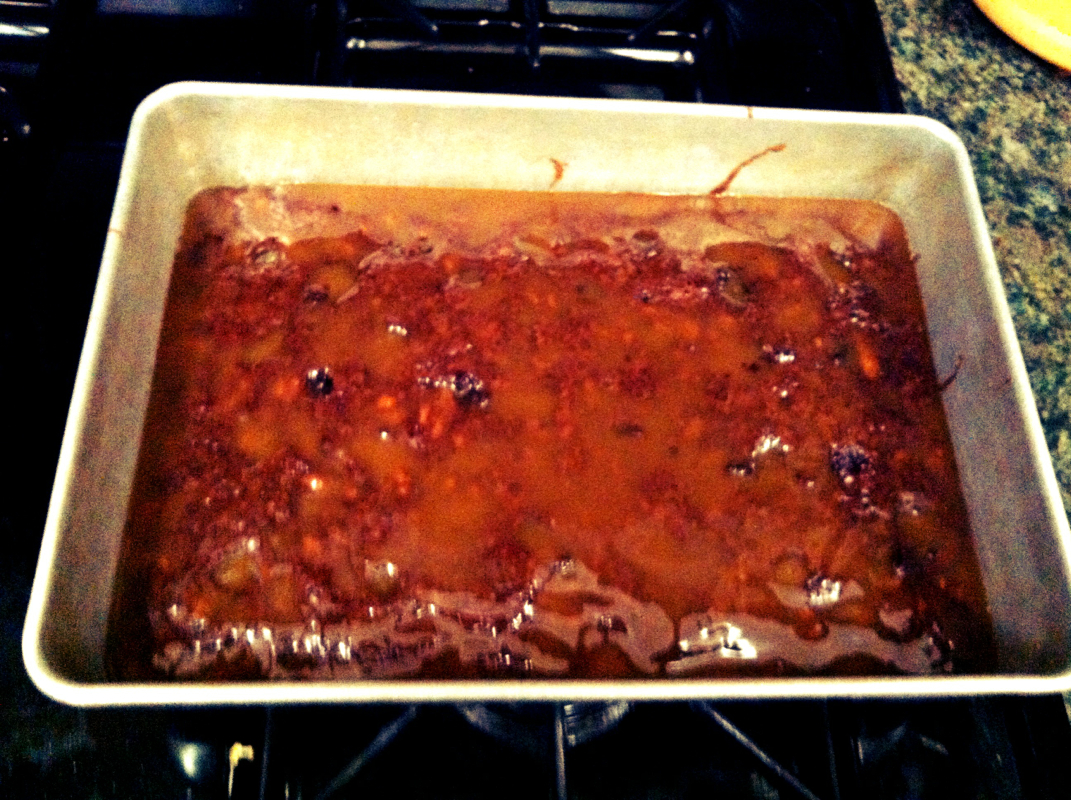
Mix eggs, oil, water, about 3/4 of the nuts and mix. Bake in a greased & floured 16X9 cake pan at 350 for 30 minutes. While the cake is hot/warm poke holes in the top. Then pour the caramel sauce over the top and spread. It will seep into the holes and leave a gooey layer on top. Stick it in the fridge for atleast a half hour. Then cut in to squares and top with whipped cream and the rest of the nuts! It will be gooey-bowls might be a good idea. And after I tried it-vanilla ice cream would've been AWESOME!
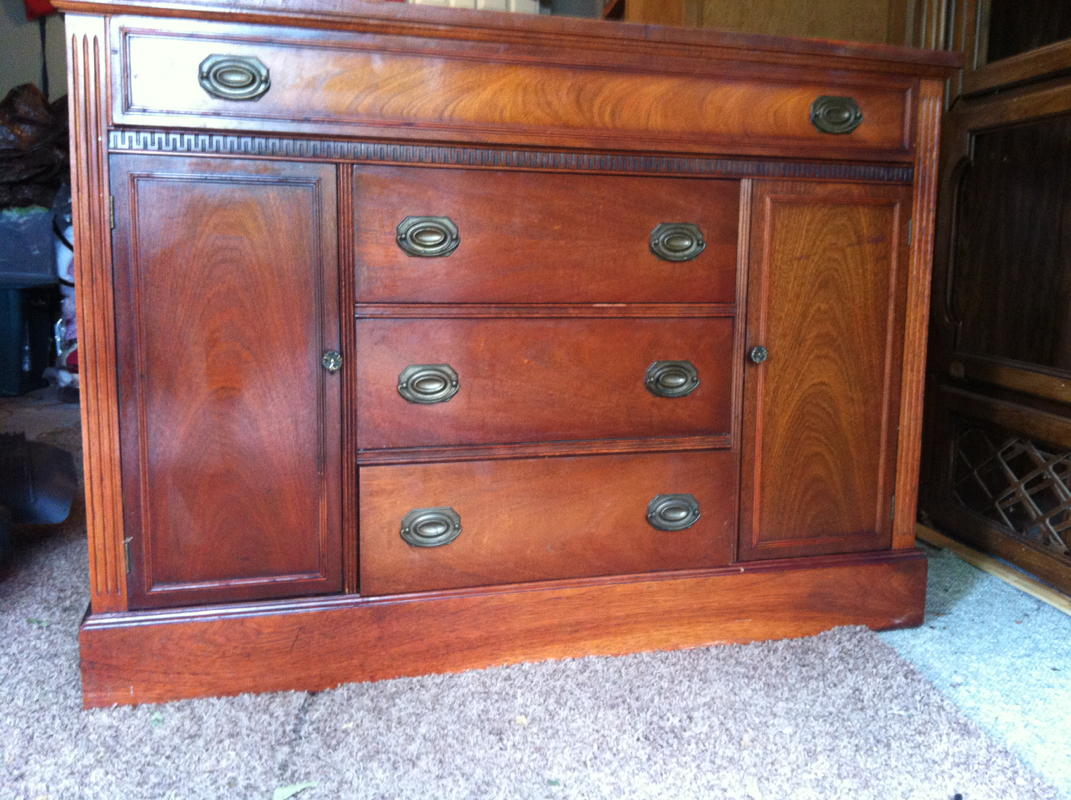
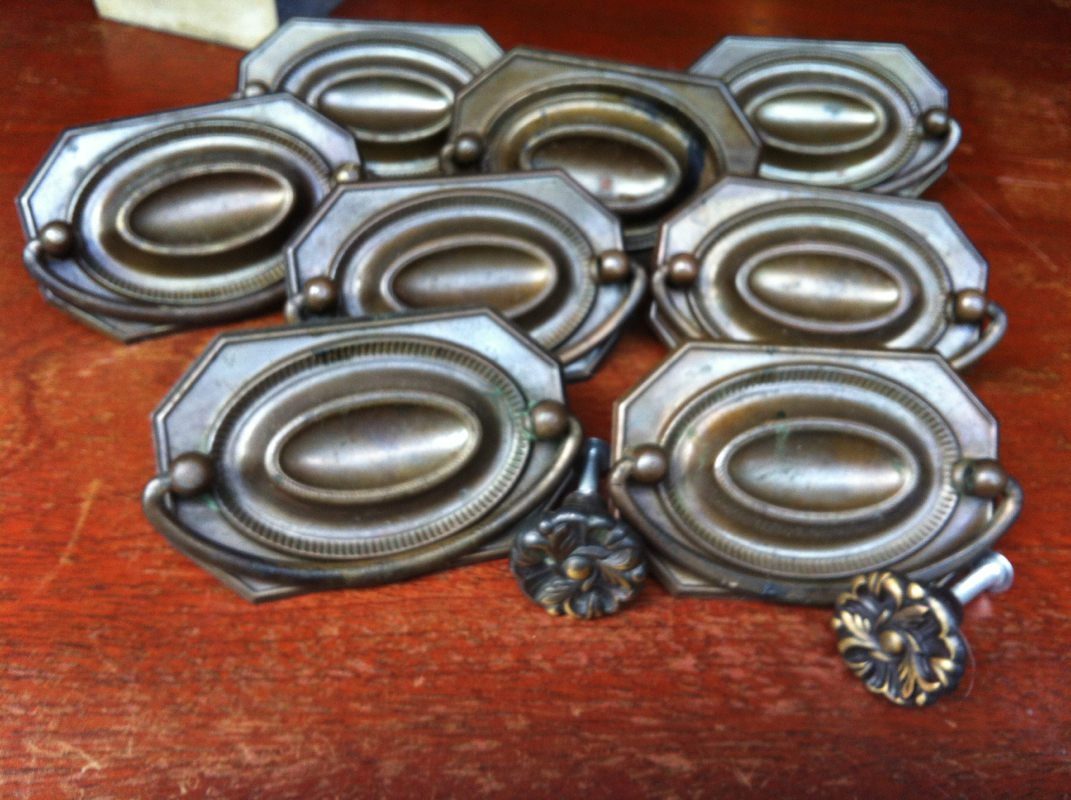
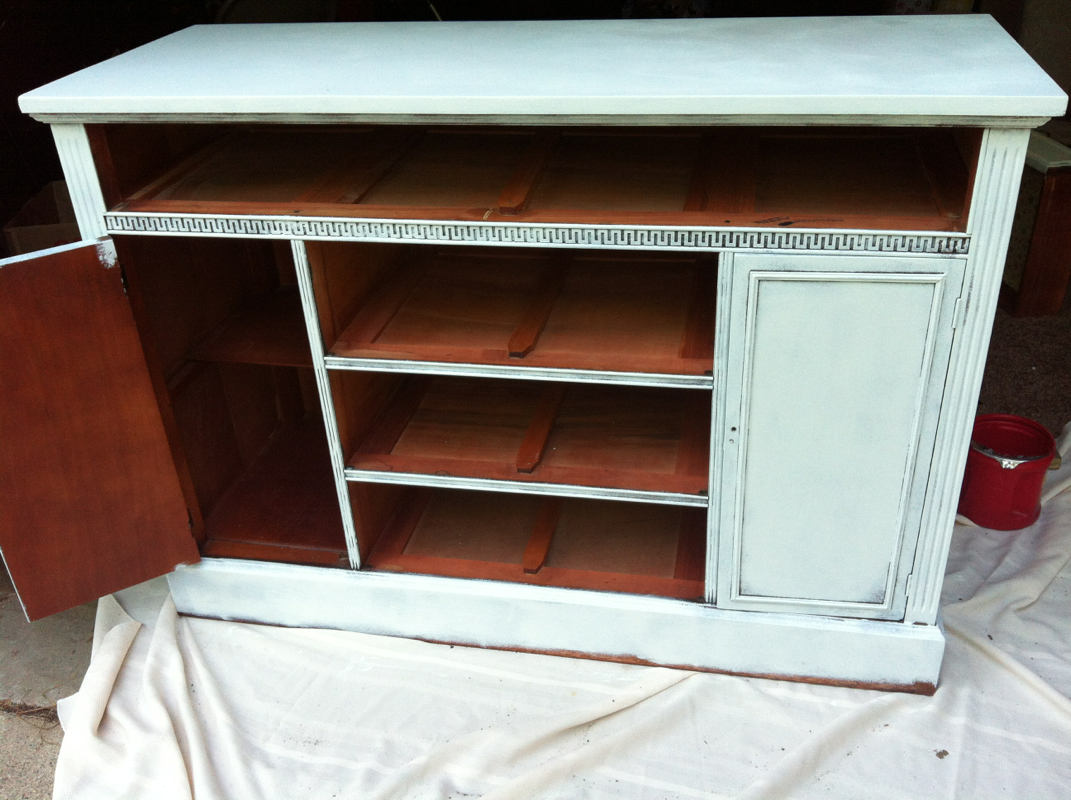
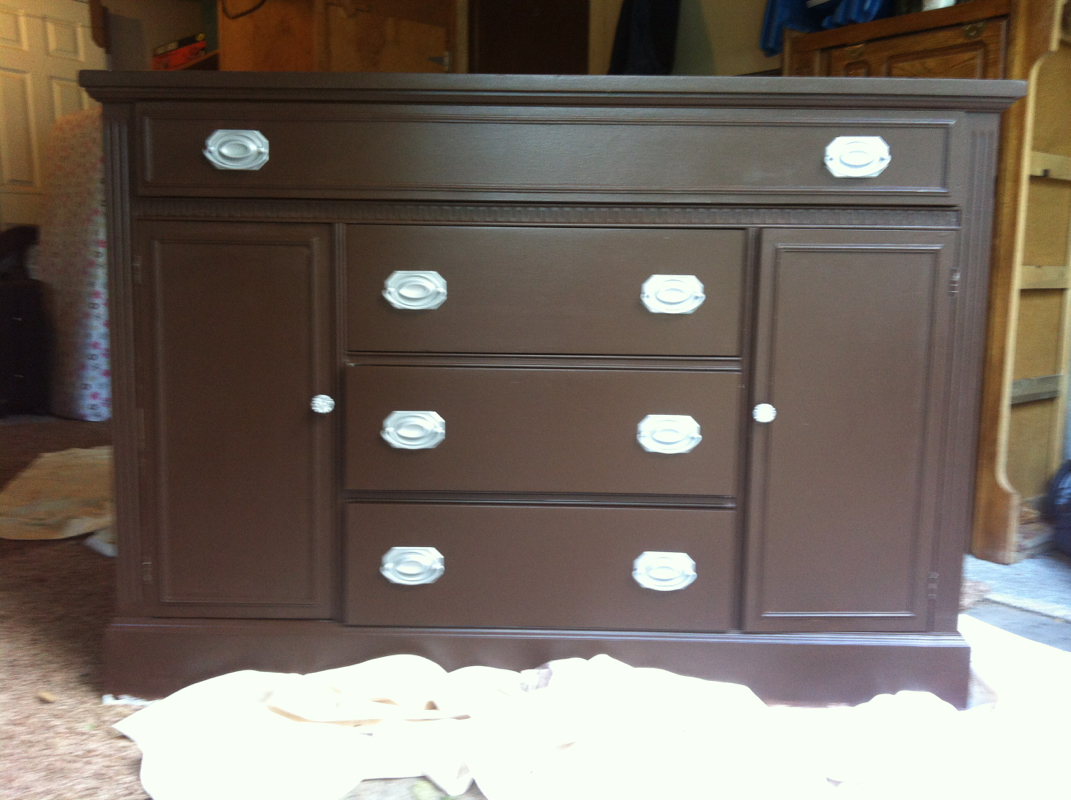
About 3 years ago my Grandma passed away. At that time I didn't have space for any more furniture but I didn't want to see some of her stuff given away. I took this buffet and her hutch (which I am also refinishing). They have been sitting in my parent's garage ever since. Well, my hubby and I are looking at homes with more space so I will have a space for these things!!! But-as you can see- this buffet needed some updating. It's hard to tell from the picture but it's actually pretty worn out... The wood is faded in areas because of the sun and it is in pretty rough shape. I don't necessarily mind the hardware, but all of our current stuff has more of a silvery look so I wanted it to match, or atleast be close. I started by using 2 coats of this primer-after thought: I should've used a darker primer! It was 1-2-3 primer by Zissner and it is meant to adhere to any surface without sanding! Hooray for that. I did sand the top, only because it had some water damage and I figure it will get used more and be more likely to chip than the other areas.
This project took me 2 days, but I was doing it during naptime and after bedtime (before sundown), so really not bad at all. I used a premixed can of 'Espresso' satin paint from Home Depot and a small roller. I did hardly ANY trimming with the brush and (as you can see) didn't paint the inside because I am LAZY! I really like the finished product and will really love knowing I have something special in our new home!
This binder was the start of this whole blog/website idea. A few friends suggested it so...here I am. It took me awhile to figure out how to do it so people could get their own pages from my templates, so I hope they work! NOTE: YOU HAVE TO GO TO KEVINANDAMANDA.COM AND DOWNLOAD THE FONTS I USED IN ORDER TO GET THE PRINTABLES. THEY ARE PEAS JENNY SCRIPT AND THE PEAS IN LOVE DOODLES. Otherwise the formatting will be all wrong. You might have to hit "enter" here and there to get everything just so, but they should be close enough so you can figure it out. If you click on either link above, it should bring you directly to the page needed to find each font and then you just have to download them...it takes about 5 seconds. FREE EDITABLE PRINTABLES FOR OUR FAMILY BINDER
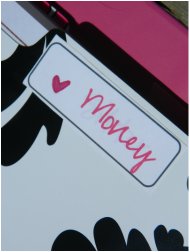
printable labels, simplify page, printable monthly budget sheet, Bill Tracker, shopping list, coupon list, contact list, medical info page, emergency info, Rules and Routines , baby log, printable calendar 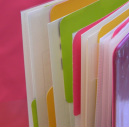 It seems like everyone is using these handy binders to keep their lives in order lately, and I am no exception. There are so many cute tutorials out there, but everyone's family is a little different. That's why I tried to make it easy to edit these pages-so you can make your's personal, without having to spend hours at the computer like I did!
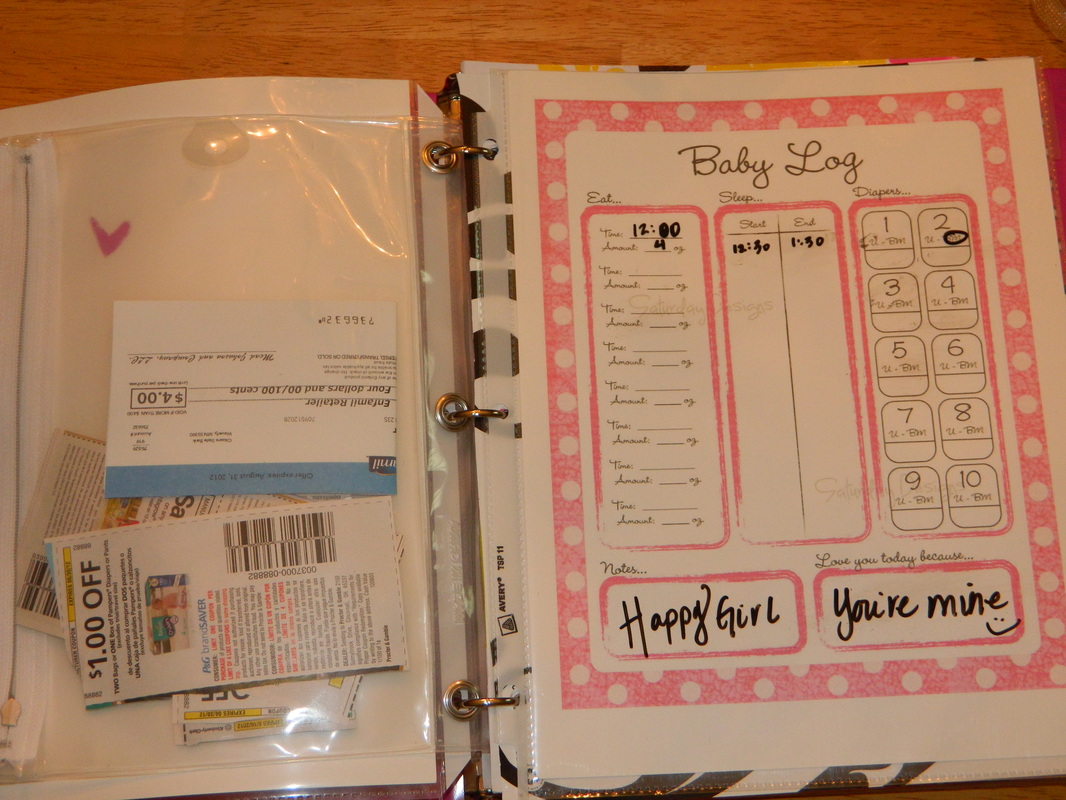
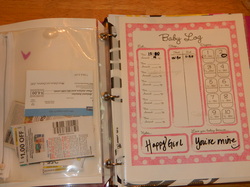 I use this awesome printable baby log from etsy as a laminate inside a plastic page protector (she suggests putting it in a frame as DIY dry erase board). There is another zippy pouch here to keep coupons for baby supplies separate from my grocery coupons.
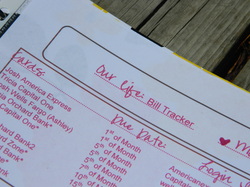 This is our bill tracker. I use this to keep track of due dates on revolving things like credit cards, cell phone bills, etc. I have them sorted by due date and made a column for login info since we can never keep our passwords straight!
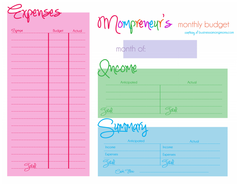 I found this budget sheet online and it is the best. Simple and straight forward (AND FREE!!)...why change a thing?!
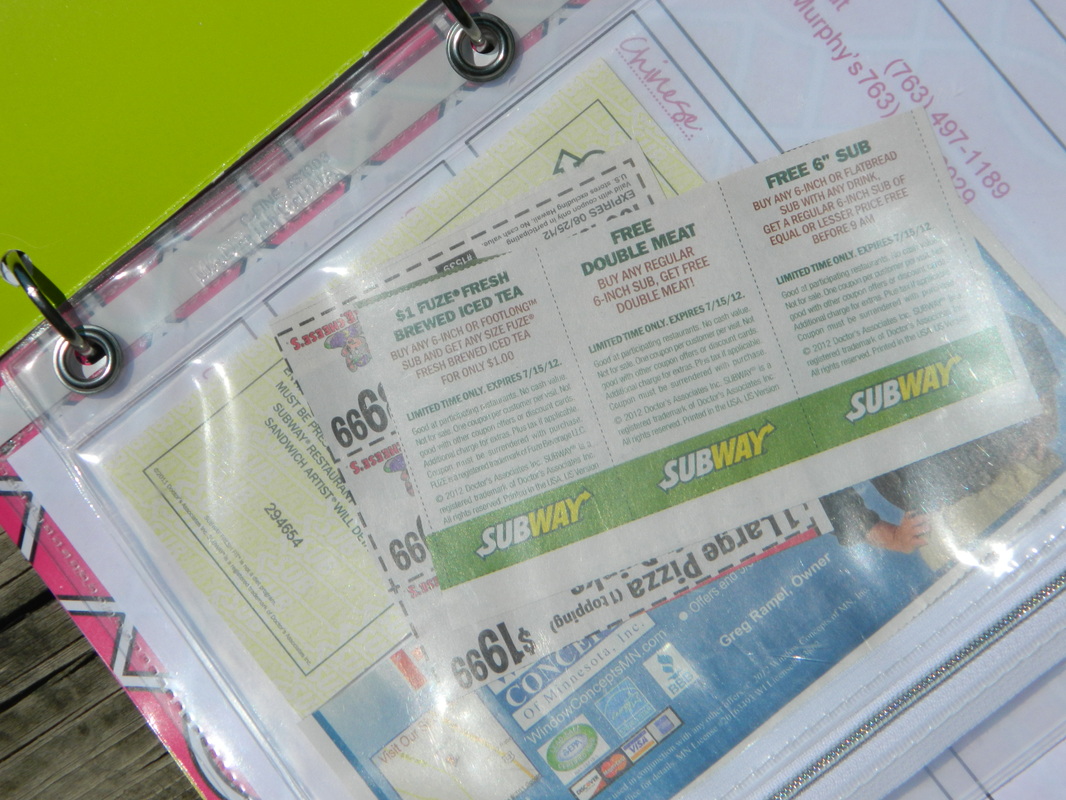
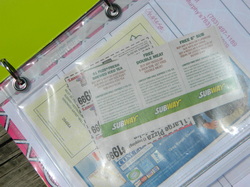 Again with the zippy pouches! I keep restaurant coupons in a separate zippy pouch and included a phone list of pizza places, etc for the sitter....ie the "simplify page"
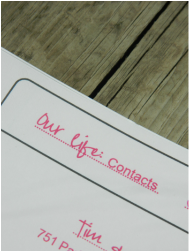 I can never keep my address book organized so I started from scratch on this contacts page. I keep phone #s in my phone and emails in my email contacts, but I can never find addresses when I need them. I finally took the time to put them all in one place...The contacts page only includes names and addresses. I put them in plastic page covers and then keep post-its in the binder. Instead of having to add them right away or keeping scraps of paper all over the house, I write any new addresses on the post-it, stick it to a page and add it to the list when I have time.
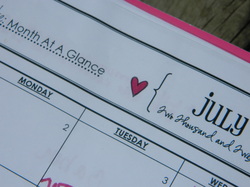 I made a "plan" section at the back so my hubby, the sitter and I all have one place to reference eachother's and the kids' schedules. I loved this printable calendar (this woman's site inspired my whole binder) so I didn't create my own...but I DID feel the need to color that little heart pink! ha :)
| 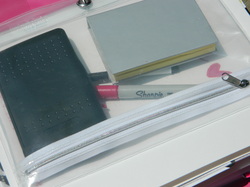 The first thing I did was buy 4 zippy pouches at $.75 each to hold various items I always need. The first one holds my calculator, a sharpie,coupon scissors, a pen, a fine point dry erase marker (for my DIY laminate baby log and grocery list) and post-its.
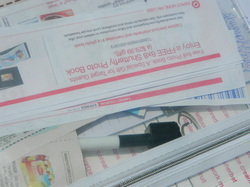 I have a section labeled "shop" where I keep my DIY laminate grocery list (notice another fine point dry erase marker), another zippy pouch for coupons and a coupon list I created to keep my coupons straight. I cut out the coupons, stick them in the pouch and then write what the coupon is for and the expiration date on the coupon list. Then after I use it, I just cross it off the coupon list. Its a lot easier to keep track of them than one of those foldy coupon holders.
This is my grocery list-stuff we buy regularly, Again, I stuck it in a page protector and use the dry erase to circle things we need....the little 'c's are things I have coupons for. I used cardstock rather than plain paper to make this a little more durable. 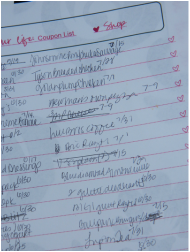 The coupon list... disregard the chicken-scratch handwriting!
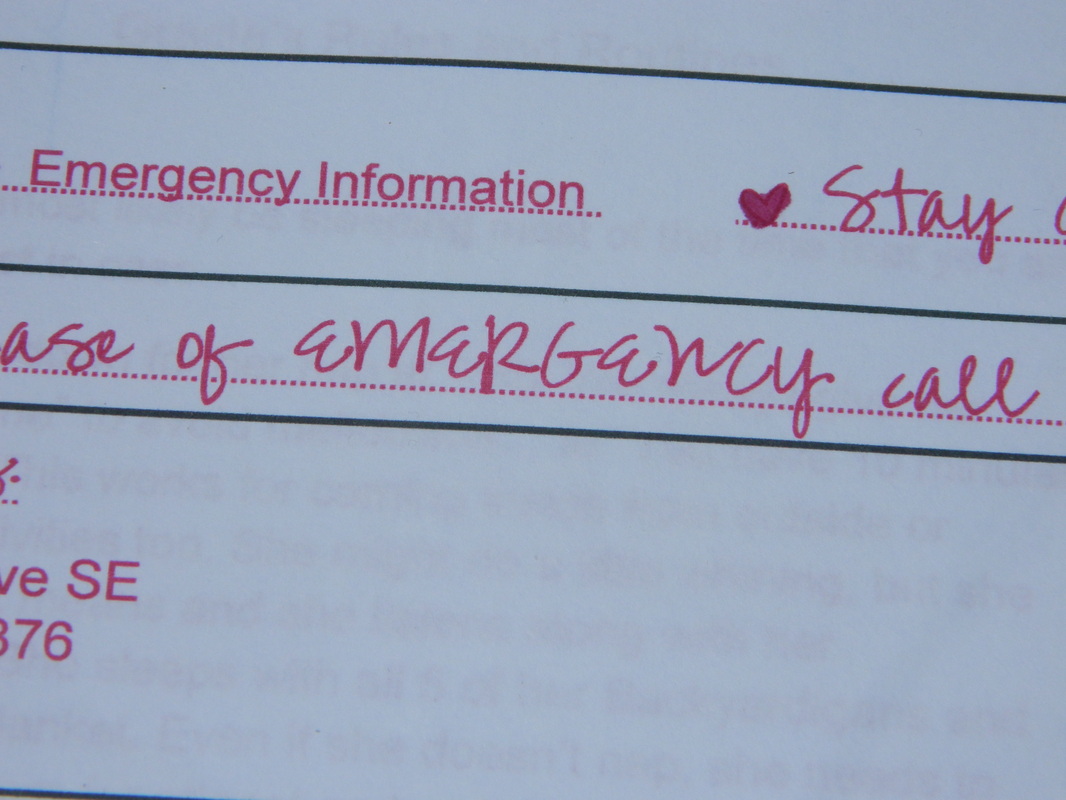
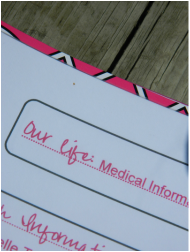 A created a section of emergency info for the sitter that includes the kids' dr #s, allergies, and current dosage info of Tylenol and ibuprofen. I also made an emergency page with the number for the vet, local police, grandma & grandpa's #s, and poison control-just in case!
| Another thing I included but don't have a pic for is the "Rules & Routines" page I included for the sitter. I wanted her to have a place to go if she had questions about the kids' rules, discipline, and the routines of bedtime, naptime, etc.
 I created these "labels" which I adhered to file folders(3 pack at Wal-mart $1) with a glue stick, rather than trying to format and buy actual labels for printing. I printed these, the grocery list, and contacts pages all on cardstock rather than plain paper for durability.
Supplies & Price List for Binder 1. 4 plastic zippy pouches from Wal-mart $0.75 each.
2. White paper and white cardstock-had on hand.
3. 3 pack of file folders (cut in half and 3-hole punched to make 6 section dividers) $1.00.
4. 3 pack fine point dry erase markers. I had mine on hand but saw them at Wal-Mart for under $4.00.
5. Plastic page protectors (to use as laminates for baby log, grocery list)-had on hand.
6. 3 Ring Binder. -had on hand but sell for under $4.00.
7. Pen, calculator, post-its, coupon scissors -all on hand.
8. Baby log from etsy $3.50.
9. gluestick for adhering "labels" to file folders.
10. Printer ink and time!
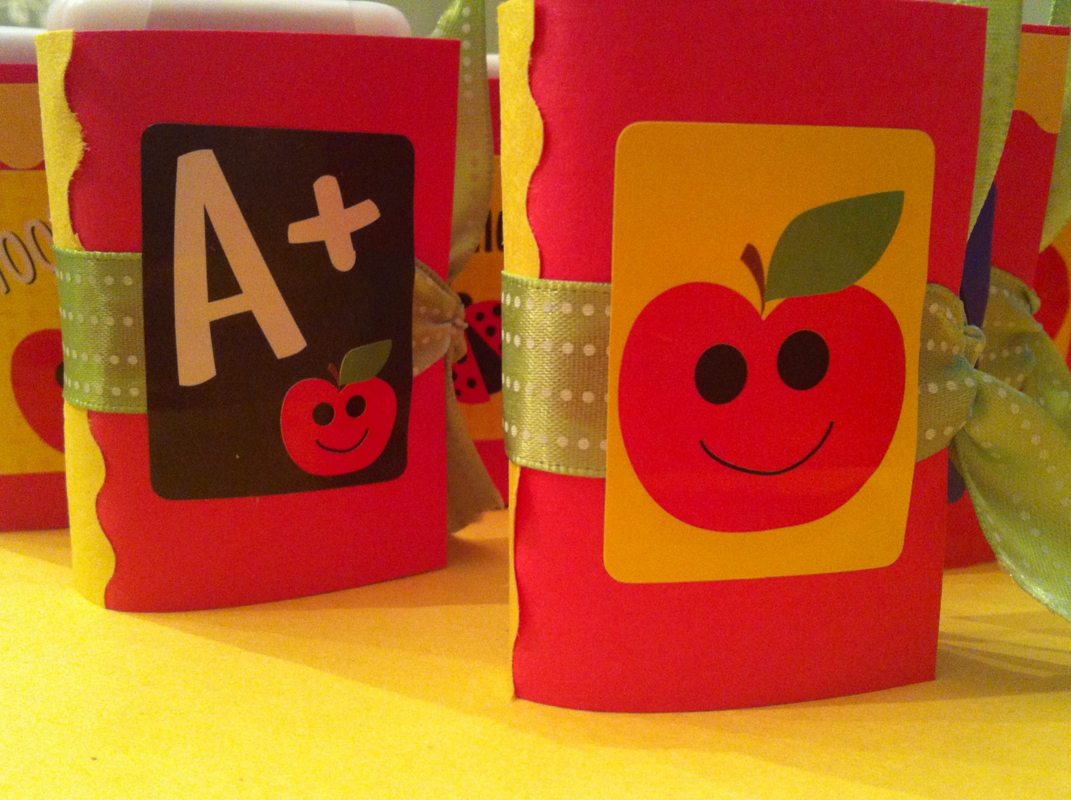
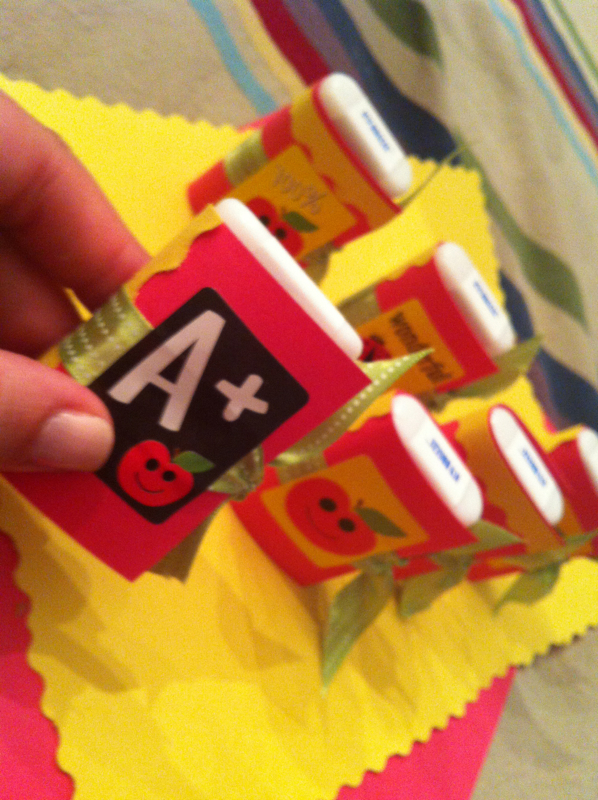
Tic Tac Teacher gifts!! I saw the idea for wrapping Tic Tac containers for wedding favors and decided to make them teacher friendly. I took red card stock and measured the mint container, then cut it to fit so it looked like a book. The yellow is just construction paper cut with a ruffled edge scissors. I glued the ribbon on and then put the sticker over the top to make sure it stayed in place.The cover is also glued on the inside to either side of the mint container. The mints are easy to get to-just flip the top as usual. PS: I used generic mints from the dollar store, ribbons and stickers from the dollar store and paper I had at home. On case you are keeping track, that's $3 for 4 tailor made teacher gifts, with plenty of stickers and ribbon left over!
|


 RSS Feed